SAGINAW AND MANISTEE, BELLEMONT LINE: NORTH OF KENDRICK PEAK, PART 2; SWITCHBACKS IN THE WOODS
(KENDRICK NORTHLINE: EAST BRANCH)
COPYRIGHT, ALL RIGHTS RESERVED
MAPS COURTESY OF GOOGLE MAPS (REGISTERED TRADEMARK)
Part two continues with the exploration of the grade north of Curley Seep Tank (this tank is covered more extensively in an earlier post, with its relationship to the Kendrick East Line on the east side of Highway 180.) Our starting point will be at FR9002F where the spur crosses the forest road (35.45768 N, 111.79329W.) All coordinates were taken by smart phone and should be used as a general reference only. Always have a good map with you at all times.

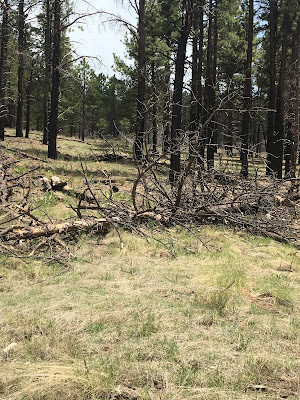
Keep a sharp eye out, as the roadbed at times becomes hard to define. You may even have to do a careful search pattern to pick up the trail. Always be careful stepping over down trees; a snake could be resting on the other side. I trod like a horse on paver stones, so they can easily pick up the vibrations as I approach.
As you approach the ridge line, the roadbed becomes more defined.
The grade will cross several open areas. keep a keen eye where you trod. Now comes the surprise: there is a double switchback on this spur! As indicated on the map, the spur double backs and then descends the ridge (35.46055 N, 111.80009 W.). I certainly was excited; finding this in such a remote area indicated that this timber stand was worth the extra effort to build switchbacks. This region that the Saginaw logged has a number of switchbacks, which is unusual in comparison to other lines that they built. It tends to lead me to believe that there was a temporary change in engineers, and that the terrain required these special techniques to reach the timber. More on this theory in Part Three.
View towards the first switchback
The Ramp where the first switchback is located. Line splits to the right.
Looking towards the switchback lead. The switch lead track continues on for a short distance, estimated that this could hold a locomotive and four or five log cars
End of the first switchback lead track. Definitely a lead spur, as the line did not continue along the ridge.
Downgrade from the first switchback.
Grading and rock work define the roadbed
Evidence along the grade
This view is looking towards the second switch back (35.45911 N, 111.80020 W.)
Looking back where previous image was taken.
The grade continues on the left
View looking along switchback lead track.
The lead track continues for a distance, until it dead ends in a box canyon. A great deal of slides and down trees were evident in the canyon. I did not see any indication of a water tower or tank, evidently the engine could carry adequate water for the journey from Curley Seep Tank.
The line continues past the switchback and enters an open park area. There is evidence that two sidings were at this location.
The line ends near a forest road (35.45929N, 111.80164W.) I had driven this section of road, until it turned into a trail. At one time, it continued on and connected with the forest road at the top of the ridge. Little did I know that just a short walk away would be a Saginaw line. It takes persistence, research and a keen eye to locate these vanishing logging spurs in the woods. That's what makes it so interesting; "you never know what you might get in a box of chocolates (apologies to Forest Gump.)"
Parts 3 and 4 are soon to follow.


.JPG)
.JPG)

.JPG)

.JPG)
.JPG)
.JPG)
.JPG)
.JPG)
.JPG)
.JPG)
.JPG)


No comments:
Post a Comment